Limited space doesn’t mean limited gardening opportunities. A mini greenhouse or cold frame can transform even the smallest balcony, patio, or corner of your yard into a productive growing area that extends your season by months. These compact structures create protected microclimates that shield plants from harsh weather while maximizing limited square footage. Whether you’re looking to start seedlings earlier, grow cool-weather crops longer, or protect tender plants, a properly designed mini greenhouse or cold frame is your solution for year-round gardening in tight spaces.
What Is a Mini Greenhouse Cold Frame?
Before diving into construction, it’s important to understand the difference between these two season-extending structures and how they can work in compact spaces.
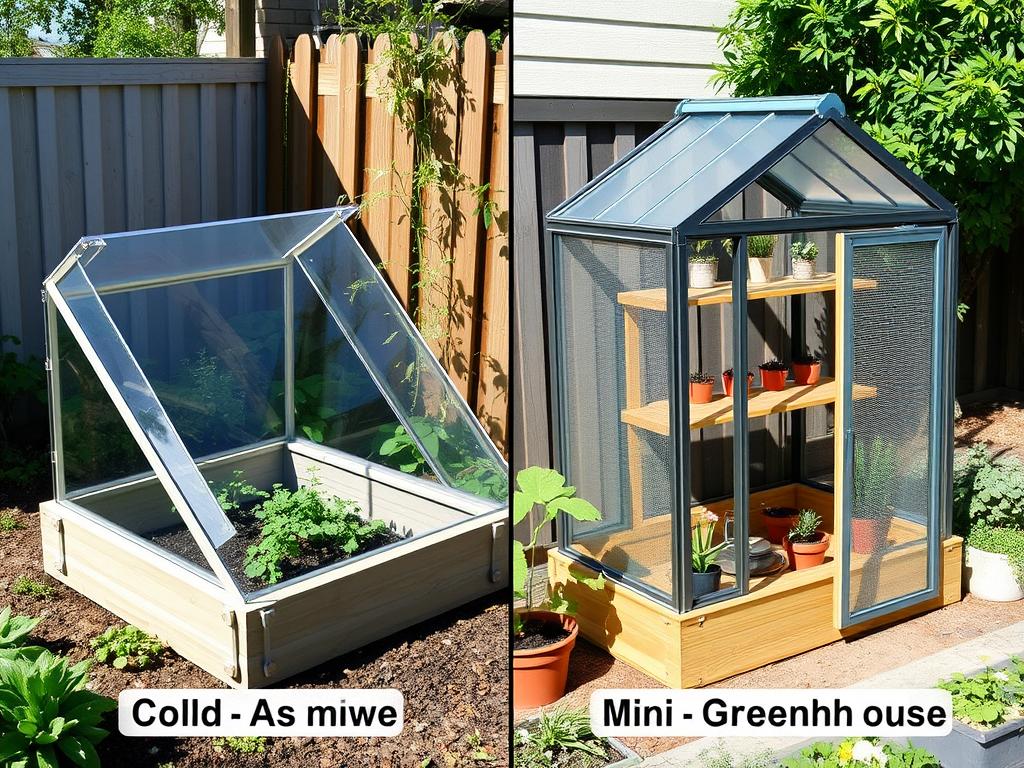
Cold Frames: The Simple Solution
A cold frame is essentially a bottomless box with a transparent lid that sits directly on the ground or a raised bed. Think of it as a mini greenhouse without the height. Cold frames work by trapping solar heat during the day and slowly releasing it at night, creating a microclimate that’s typically 5-10°F warmer than outside temperatures.
Cold frames excel in compact spaces because they:
- Require minimal materials and construction skills
- Can be as small as 2×3 feet – perfect for tiny gardens
- Protect plants from frost, wind, and heavy rain
- Need no electricity or supplemental heating
- Work well for low-growing crops like lettuce, spinach, and herbs
Mini Greenhouses: Vertical Growing Power
Mini greenhouses are scaled-down versions of traditional greenhouses, typically standing 3-6 feet tall. They utilize vertical space while maintaining a small footprint, making them ideal for balconies, patios, and small garden corners.
Mini greenhouses are perfect for compact spaces when you need:
- More growing area through vertical shelving
- Room for taller plants like tomatoes or peppers
- A protected environment for starting seedlings
- A portable structure that can be moved as needed
- Protection from pests as well as weather
Not Sure Which Structure Is Right for Your Space?
Take our quick assessment to determine whether a cold frame or mini greenhouse would work better for your specific gardening needs and available space.
Materials and Tools You’ll Need
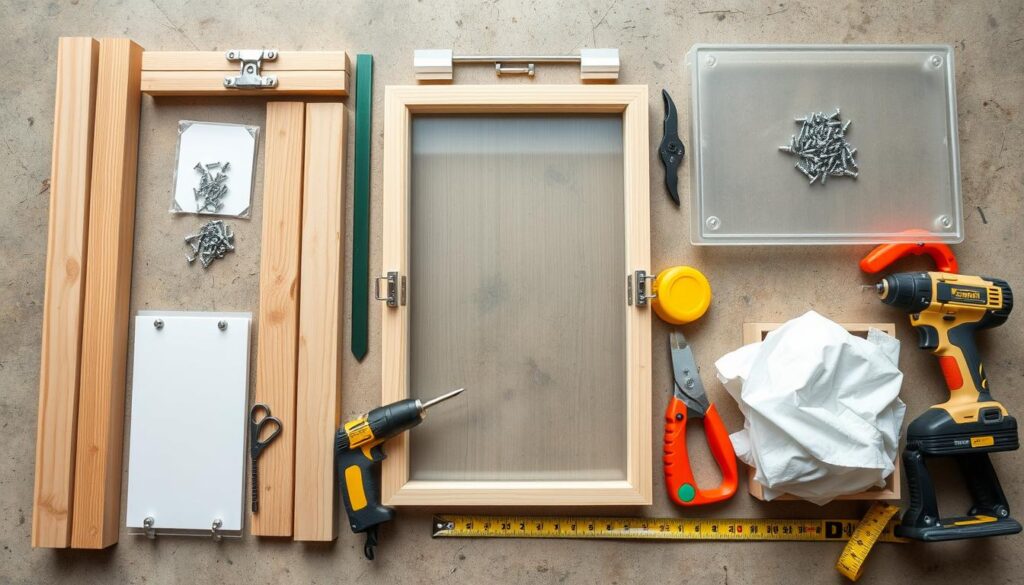
Building your own mini greenhouse or cold frame doesn’t require expensive materials or specialized tools. In fact, you can create an effective growing structure using recycled materials or budget-friendly options from your local hardware store.
Budget-Friendly Material Options
For Cold Frames:
- Salvaged windows or glass doors for the lid
- Untreated lumber (2×8s or 2×10s work well)
- Straw bales for temporary seasonal frames
- Cinder blocks for long-lasting sides
- Old hinges and handles from cabinet doors
- Weatherstripping for better insulation
For Mini Greenhouses:
- PVC pipes for the frame structure
- Clear plastic sheeting (6 mil thickness)
- Repurposed shelving units as internal supports
- Zip ties for securing plastic to frame
- Bungee cords for door closures
- Plastic milk jugs for thermal mass
Durable Professional Materials
For Cold Frames:
- Cedar or redwood lumber (naturally rot-resistant)
- Polycarbonate panels for the lid (better insulation than glass)
- Automatic vent openers (temperature-activated)
- Galvanized corner brackets and screws
- Silicone weatherseal for gaps
For Mini Greenhouses:
- Aluminum framing components
- Twin-wall polycarbonate panels
- Proper greenhouse hinges and door latches
- Shade cloth for summer heat management
- Automatic irrigation systems
Essential Tools
- Measuring tape and square
- Drill with various bits
- Saw (circular, hand, or jigsaw)
- Screwdriver set
- Utility knife
- Level
- Safety equipment (gloves, eye protection)
DIY Cold Frame Construction for Compact Spaces
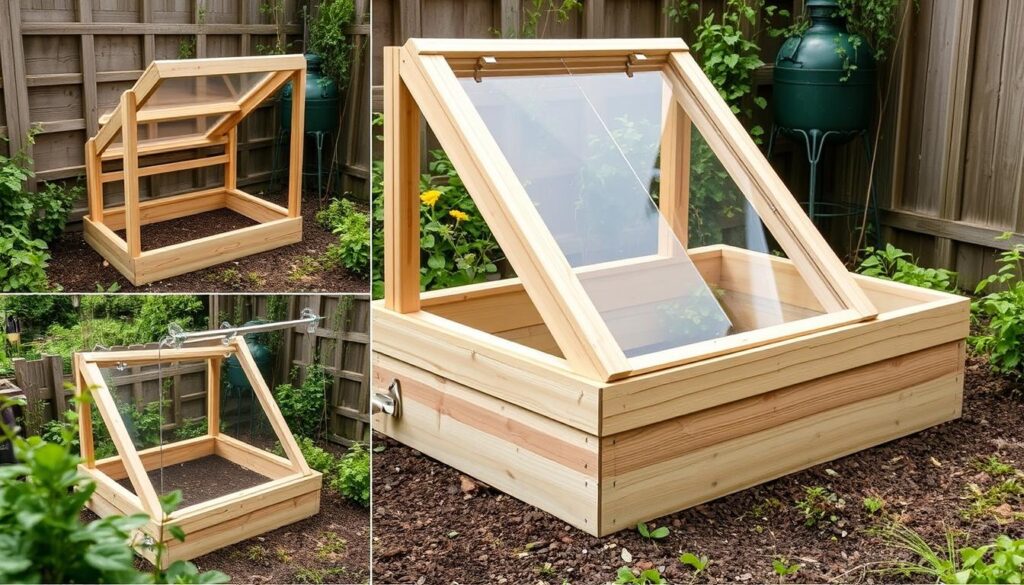
A cold frame is the perfect starter project for small-space gardeners. This design creates a 3×4 foot growing area that can fit in even the most limited garden spaces while providing excellent protection for your plants.
Step-by-Step Construction Guide
- Choose your location – Find a spot that receives at least 6 hours of direct sunlight daily, preferably with southern exposure. The area should be level and have good drainage.
- Prepare the base – Clear the area of weeds and debris. If placing on soil, consider adding a 2-inch layer of gravel for drainage.
- Cut your lumber – For a 3×4 foot cold frame, cut two pieces at 4 feet long (front and back) and two pieces at 3 feet long (sides). The back piece should be taller (12 inches) than the front (8 inches) to create a sloped lid that sheds water and maximizes sun exposure.
- Assemble the frame – Connect the four sides using galvanized corner brackets and screws. Ensure the corners are square by measuring diagonally from corner to corner.
- Create the lid – Build a simple frame from 1×2 lumber that’s slightly larger than your cold frame opening. Attach your transparent material (polycarbonate panel or repurposed window) to this frame.
- Attach hinges – Mount the lid to the back (taller) side of your cold frame using sturdy hinges.
- Add a prop stick – Create a simple notched stick that can hold the lid open at various heights for ventilation.
- Seal any gaps – Apply weatherstripping around the top edges where the lid meets the frame to improve heat retention.
Space-Saving Modifications
For extremely limited spaces, consider these adaptations:
- Wall-mounted design – Attach one side of your cold frame to an existing wall or fence to save space and add thermal mass.
- Stackable cold frames – Create multiple small frames (2×2 feet) that can be stacked or arranged in different configurations as needed.
- Fold-away sides – Design side panels that can fold down when not in use during summer months.
- Raised bed conversion – Build adapters that allow your cold frame to fit over existing raised beds temporarily.
Get Detailed Cold Frame Plans
Download our free, detailed plans with exact measurements and material lists for building the perfect compact cold frame for your space.
Building a Mini Greenhouse for Vertical Growing
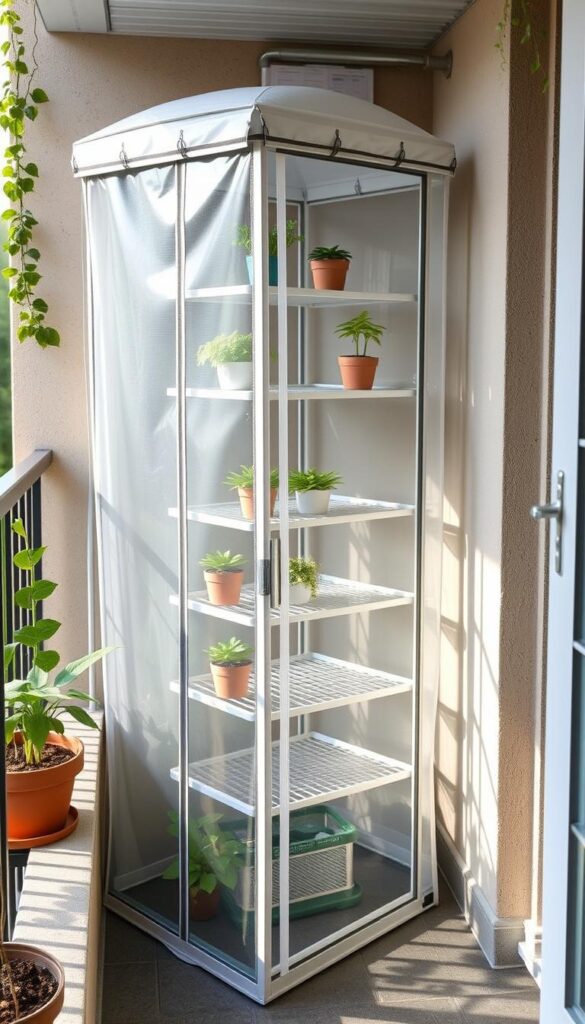
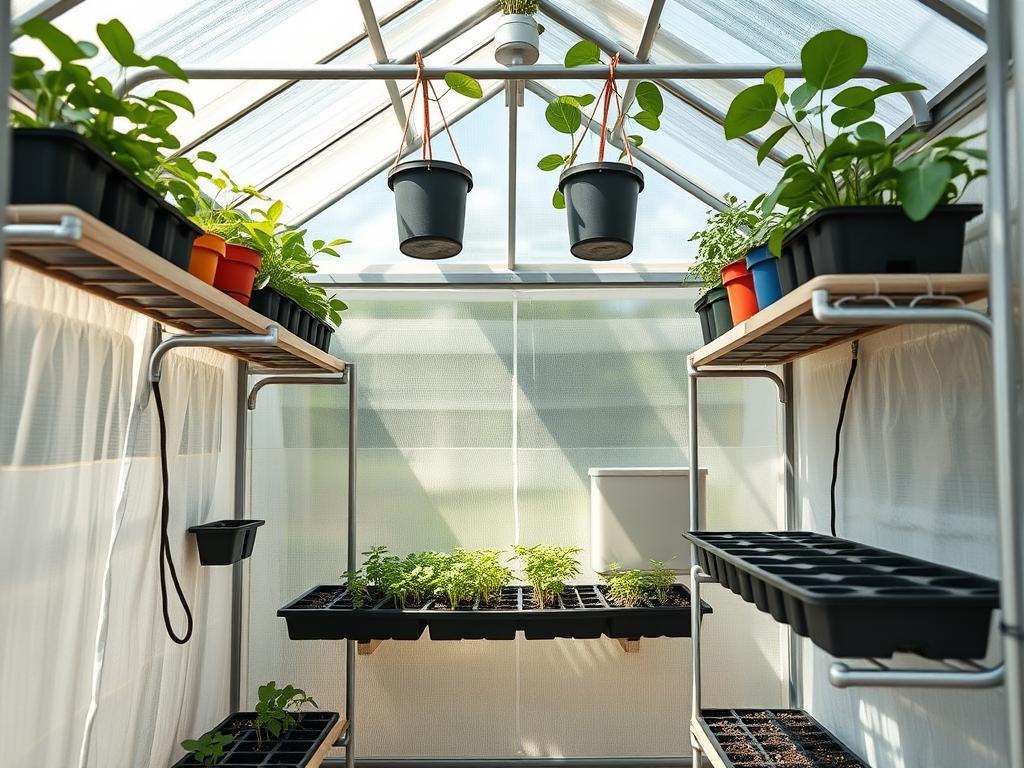
When horizontal space is at a premium, building upward with a mini greenhouse maximizes your growing area while maintaining a small footprint. This design creates a 2×4 foot structure that stands 5 feet tall – perfect for balconies, patios, or small garden corners.
Step-by-Step Construction Guide
- Create the base frame – Build a rectangular base measuring 2×4 feet using pressure-treated 2×4 lumber. Ensure it’s square by measuring diagonally from corner to corner.
- Construct the vertical supports – Cut four pieces of 2×2 lumber to 5 feet tall. Attach these to the inside corners of your base frame using corner brackets.
- Add the top frame – Connect the tops of your vertical supports with 2×2 lumber cut to match your base dimensions, creating a rectangular top frame.
- Install middle supports – Add horizontal supports between the vertical posts at 18-inch intervals to create shelf supports and add structural stability.
- Build the door frame – Create a door frame on one of the 2-foot wide sides using 1×2 lumber. Attach it with hinges for easy access.
- Add shelving – Install wire shelving or wooden slats across the horizontal supports to create growing surfaces at different heights.
- Attach covering material – Cover the frame with clear greenhouse plastic or polycarbonate panels, securing with staples, greenhouse clips, or zip ties.
- Create ventilation – Install a small vent at the top and consider adding a small battery-operated fan for air circulation.
Space-Saving Features
Enhance your mini greenhouse with these compact-space solutions:
- Fold-down work surface – Attach a hinged shelf to the exterior that can fold down when not in use.
- Hanging planters – Install hooks inside the top frame for hanging baskets to utilize vertical space.
- Tool storage – Add narrow pockets or holders on the door interior for storing small gardening tools.
- Modular design – Create a structure that can be partially disassembled and stored during off-seasons.
- Wheels – Mount the base on lockable casters to make it mobile when needed.
Water-Smart Gardening in Your Mini Greenhouse or Cold Frame
Compact growing spaces require efficient water management. These structures naturally reduce water needs by limiting evaporation, but implementing smart irrigation strategies will further conserve water while keeping your plants healthy.
Efficient Irrigation Solutions
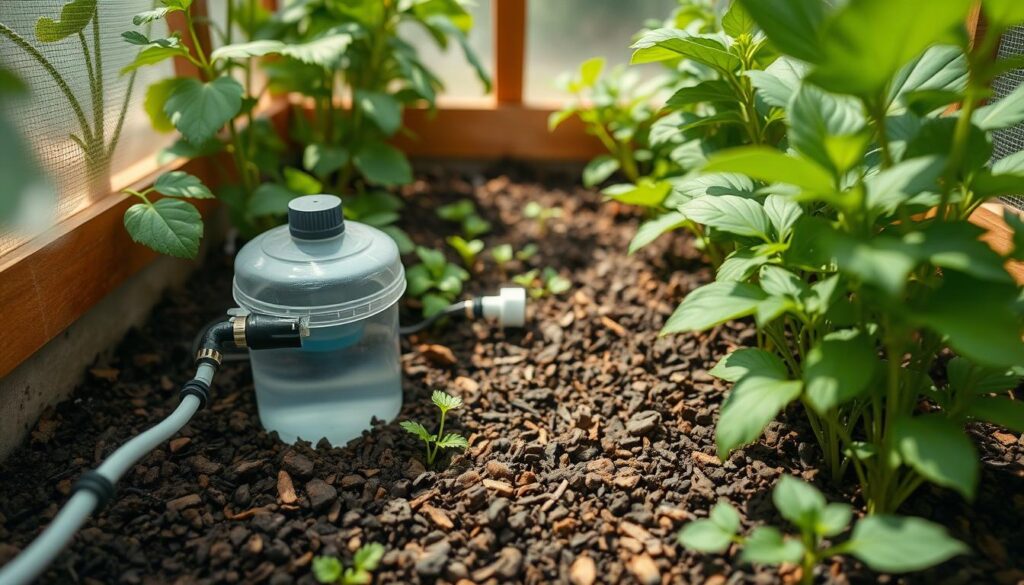
- Drip irrigation – Install a simple drip system with emitters positioned near each plant’s root zone to deliver water precisely where needed.
- Self-watering reservoirs – Create wicking beds by placing a water reservoir beneath your growing medium with wicks that draw moisture upward.
- Ollas – Bury unglazed clay pots with their openings above soil level and fill with water for slow, steady soil moisture.
- Capillary mats – Place these special fabrics under pots to distribute water evenly and reduce frequency of watering.
- Moisture sensors – Use simple soil moisture meters to determine exactly when watering is needed.
Moisture-Retaining Techniques
Implement these practices to maximize water efficiency:
- Mulching – Apply a 1-inch layer of fine mulch like coconut coir or fine compost to reduce evaporation.
- Grouping plants – Arrange plants with similar water needs together to prevent over or under-watering.
- Morning watering – Water early in the day to reduce evaporation and allow foliage to dry before evening.
- Humidity trays – Place trays of water with pebbles beneath plant containers to increase humidity.
- Thermal mass – Position containers of water inside your structure to moderate temperature and increase humidity.
Best Plants for Mini Greenhouse Cold Frames in Compact Spaces
Choosing the right plants for your limited space is crucial for success. Focus on varieties that thrive in protected environments and offer high yields in small areas.
Cold Frame Stars
These plants perform exceptionally well in the protected environment of a cold frame:
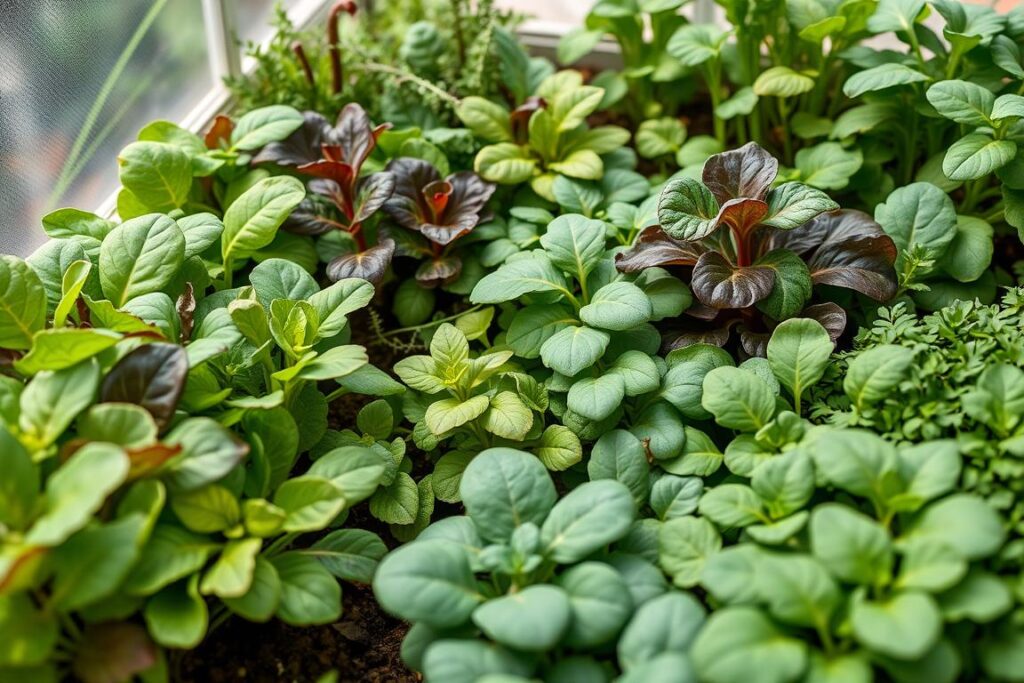
- Lettuce – Loose-leaf varieties like ‘Black Seeded Simpson’ and ‘Red Sails’ provide multiple harvests.
- Spinach – Cold-hardy varieties like ‘Bloomsdale’ and ‘Tyee’ thrive in cool conditions.
- Asian Greens – Pak choi, tatsoi, and mizuna grow quickly and tolerate cool temperatures.
- Radishes – Fast-growing varieties like ‘Cherry Belle’ mature in just 21 days.
- Carrots – Shorter varieties like ‘Paris Market’ or ‘Thumbelina’ work well in limited soil depth.
- Kale – Dwarf varieties like ‘Dwarf Blue Curled’ maximize space while providing nutritious harvests.
Mini Greenhouse Performers
Take advantage of vertical space with these plants that excel in mini greenhouses:
- Determinate Tomatoes – Compact varieties like ‘Tiny Tim’ or ‘Patio Princess’ stay manageable.
- Peppers – Both sweet and hot peppers thrive in the warm, protected environment.
- Herbs – Basil, cilantro, parsley, and chives grow well on upper shelves.
- Strawberries – Everbearing varieties in hanging baskets utilize vertical space.
- Microgreens – Fast-growing, nutrient-dense crops perfect for shallow trays.
- Dwarf Cucumbers – Varieties like ‘Spacemaster’ can be trained upward on trellises.
Seasonal Planting Calendar
| Season | Cold Frame Plants | Mini Greenhouse Plants | Maintenance Tasks |
| Early Spring (Feb-Mar) | Spinach, lettuce, radishes, peas | Start tomato and pepper seedlings, herbs | Monitor for temperature spikes, ventilate on sunny days |
| Late Spring (Apr-May) | Carrots, beets, Swiss chard, kale | Tomatoes, peppers, cucumbers, basil | Increase ventilation, begin hardening off seedlings |
| Summer (Jun-Aug) | Remove lid, use frame for heat-loving crops | Add shade cloth, focus on heat-tolerant herbs | Provide extra ventilation, monitor for pests |
| Fall (Sep-Oct) | Lettuce, spinach, Asian greens, arugula | Leafy greens, herbs, late peppers | Clean structures, replace damaged panels |
| Winter (Nov-Jan) | Kale, spinach, mâche, claytonia | Microgreens, herbs, overwintering seedlings | Add insulation, monitor during snow, limit opening |
Temperature Management in Compact Growing Structures
Maintaining appropriate temperatures is crucial for plant health in your mini greenhouse or cold frame. Without proper management, these small structures can quickly overheat or become too cold.
Preventing Overheating
Small structures heat up quickly on sunny days, potentially damaging plants. Implement these strategies:
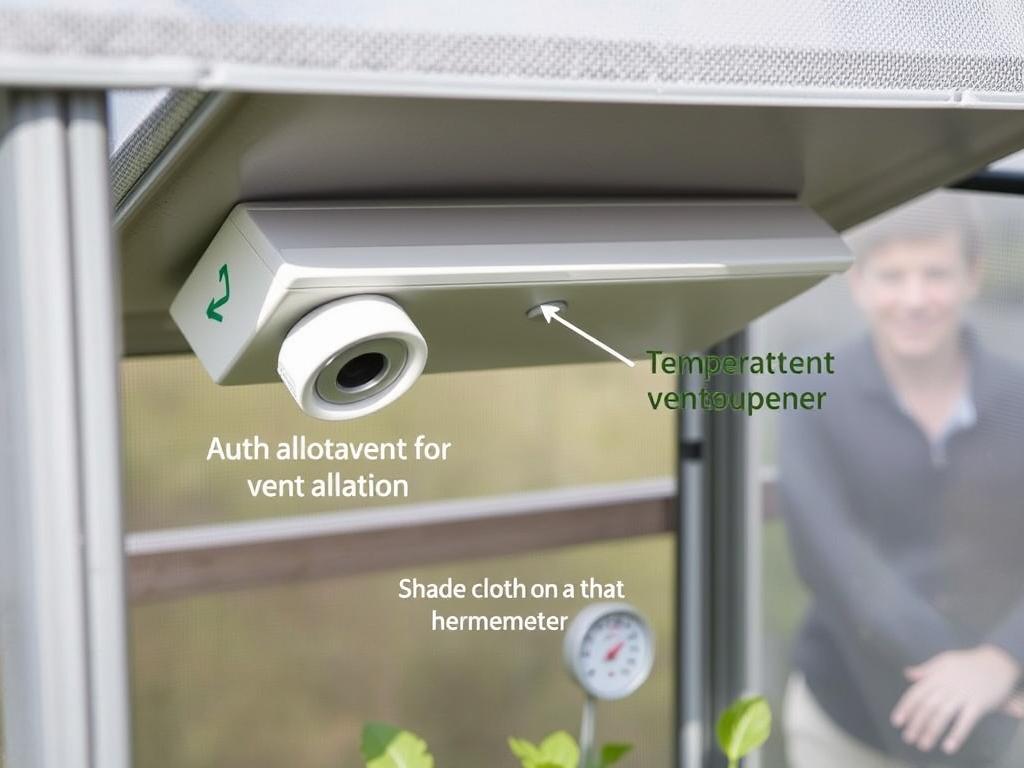
- Automatic vent openers – These temperature-sensitive devices open vents when temperatures rise above a set point (usually 70-75°F).
- Manual ventilation schedule – Open lids or doors in the morning on sunny days and close them before evening.
- Shade cloth – Apply 30-50% shade cloth during summer months to reduce solar gain.
- Thermal mass – Place containers of water inside to absorb excess heat during the day and release it at night.
- Monitoring – Install a min/max thermometer to track temperature fluctuations.
Cold Weather Protection
Extend your growing season with these heat retention techniques:
- Insulation – Line the north-facing side with reflective bubble insulation.
- Row covers – Add an extra layer of protection with floating row covers over plants inside the structure.
- Thermal mass – Fill dark-colored containers with water and place them inside to absorb heat during the day.
- Sealing gaps – Apply weatherstripping to eliminate drafts around doors and lids.
- Mulch – Apply a layer of straw or leaves around plants to insulate soil.
- Hot compost – Place a small container of active compost inside for gentle bottom heat.
Temperature Management Advantages
- Extends growing season by 4-8 weeks on either end
- Creates perfect microclimate for seedling development
- Protects plants from temperature extremes
- Reduces water needs through humidity control
- Allows for year-round harvests in many climates
Temperature Management Challenges
- Requires daily monitoring during extreme weather
- Small spaces heat up and cool down rapidly
- Limited thermal mass in compact structures
- May need manual ventilation if automatic systems fail
- Condensation can increase disease risk if not managed
Year-Round Maintenance for Long-Lasting Structures
Proper maintenance ensures your mini greenhouse or cold frame remains effective and durable for many growing seasons. These compact structures require regular attention to perform at their best.
Seasonal Maintenance Checklist
Spring Tasks:
- Clean all transparent surfaces to maximize light transmission
- Check and repair any winter damage to the structure
- Test ventilation systems and lubricate hinges
- Replace any cracked or damaged panels
- Add fresh growing medium or compost to beds
Summer Tasks:
- Install shade cloth during peak heat periods
- Check irrigation systems for clogs or leaks
- Monitor for pest infestations more frequently
- Remove algae growth from humid environments
- Ensure proper air circulation to prevent disease
Fall Tasks:
- Clean and disinfect the entire structure
- Check for and seal any air leaks or gaps
- Install additional insulation if needed
- Test heating systems if applicable
- Secure the structure against winter winds
Winter Tasks:
- Remove snow accumulation from lids and roofs
- Monitor internal temperatures during cold snaps
- Check plants for signs of cold damage
- Maintain proper ventilation to prevent mold
- Adjust watering to account for slower growth
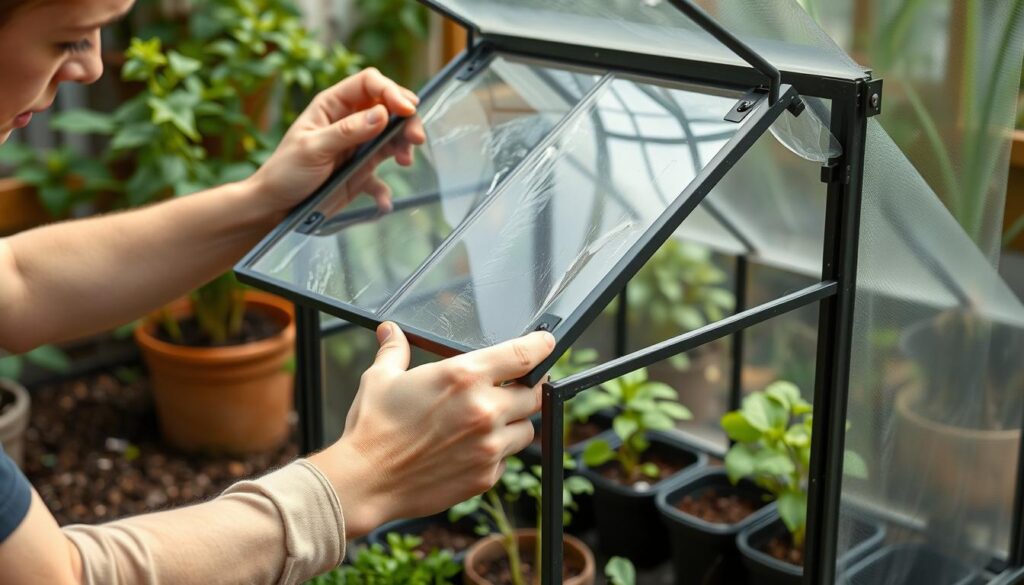
Troubleshooting Common Issues
| Problem | Possible Causes | Solutions |
| Overheating | Inadequate ventilation, direct sun exposure | Install automatic vent openers, add shade cloth, increase manual ventilation |
| Condensation | Poor air circulation, temperature fluctuations | Improve ventilation, water in morning, add small fan |
| Plant diseases | High humidity, poor air circulation | Increase spacing between plants, improve ventilation, remove affected plants |
| Pest infestations | Introduced with new plants, entering through gaps | Inspect new plants, seal entry points, introduce beneficial insects |
| Structural damage | Wind, snow load, UV degradation | Reinforce weak points, clear snow promptly, use UV-resistant materials |
Success Stories: Compact Growing in Action
These real-world examples demonstrate how gardeners have successfully implemented mini greenhouses and cold frames in limited spaces to dramatically increase their growing potential.
Urban Balcony Transformation
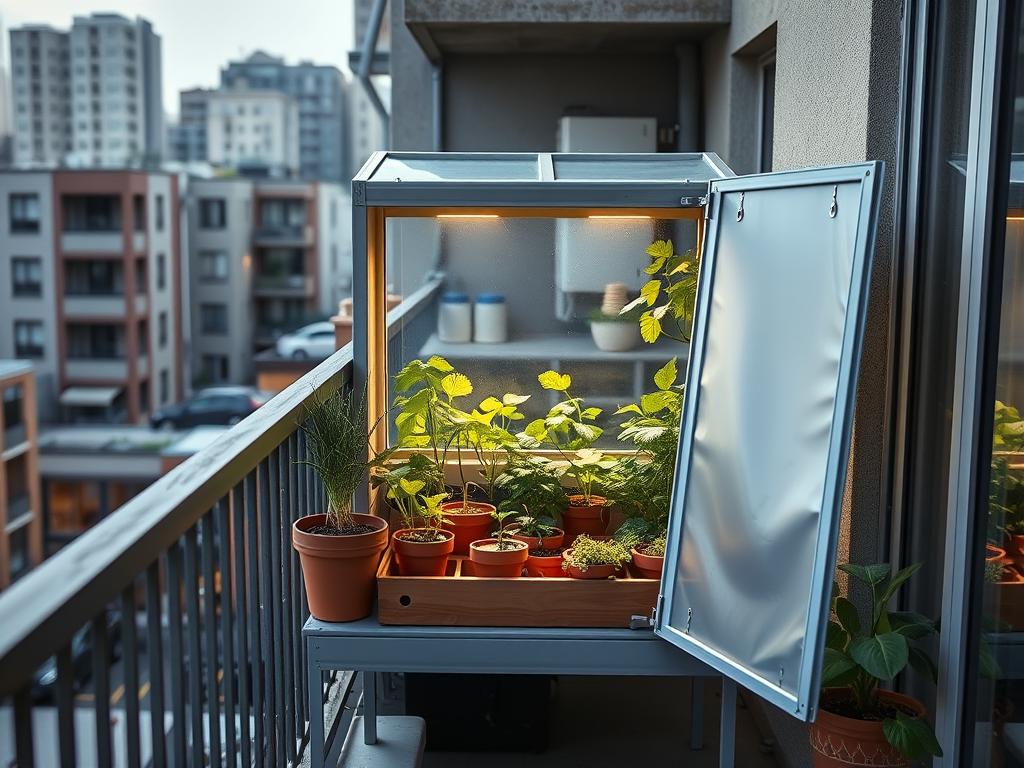
Maria turned her 4×6 foot apartment balcony into a year-round growing space using a vertical mini greenhouse. By utilizing just 2×4 feet of floor space, she now grows tomatoes, peppers, and herbs throughout the year, even in her Zone 5 climate. Her structure features fold-down shelves that double as work surfaces and a rainwater collection system integrated into the design.
Rooftop Cold Frame Garden
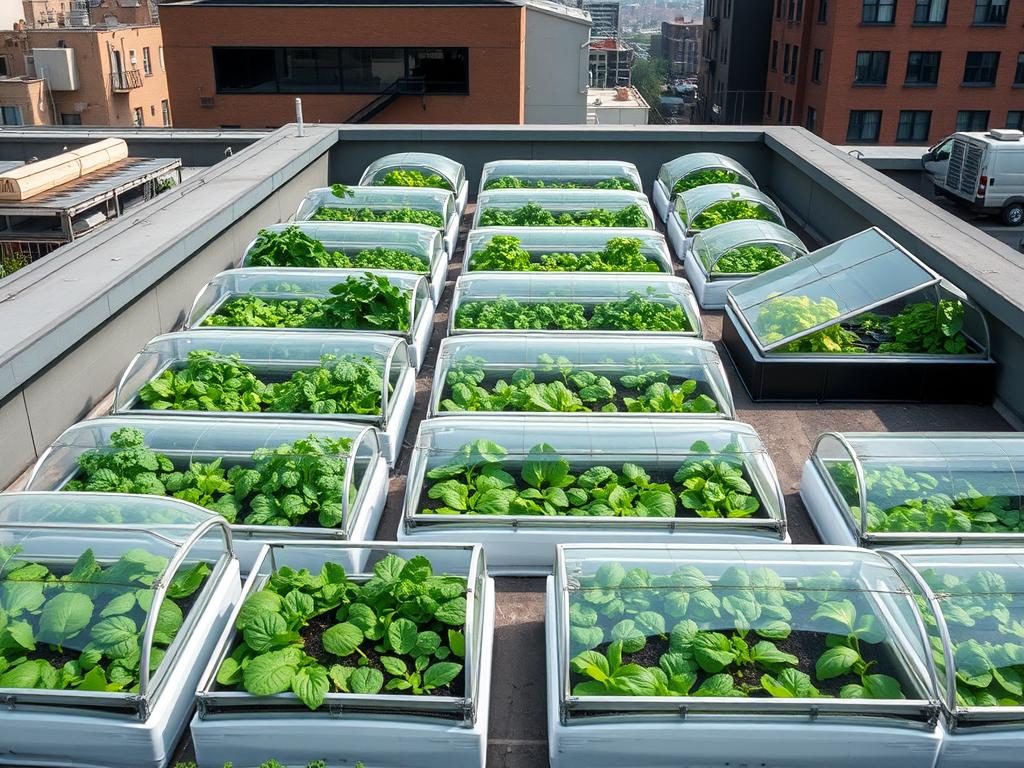
Carlos created a modular cold frame system for his 10×10 foot rooftop space. Using six 2×3 foot frames with hinged lids, he can configure them differently each season. The frames feature automatic vent openers and reflective interior walls to maximize light. This system allows him to harvest fresh greens and root vegetables year-round in his Zone 7 location.
Tiny Yard, Big Harvests
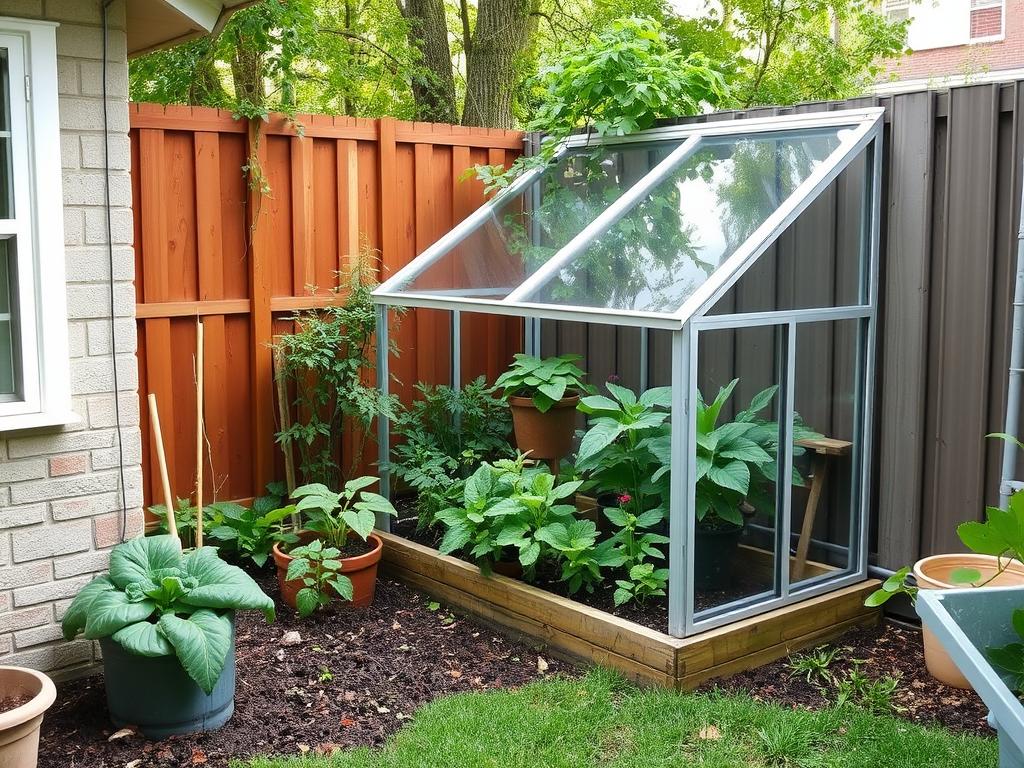
Jen maximized her small yard by building an L-shaped cold frame against existing walls. The design uses the thermal mass of the brick wall while taking up minimal space. By creating a tiered interior with different soil depths, she grows shallow-rooted lettuce and deeper-rooted carrots simultaneously. Her space-saving design produces over 200 pounds of vegetables annually from just 24 square feet.
Share Your Success Story
Have you created an innovative mini greenhouse or cold frame for a compact space? Submit your photos and story to be featured in our community gallery and inspire other small-space gardeners.
Start Growing Year-Round in Your Compact Space
A mini greenhouse or cold frame can transform even the smallest outdoor area into a productive year-round growing space. By following the construction guidelines and maintenance tips in this guide, you’ll be able to extend your growing season, protect tender plants, and enjoy fresh harvests regardless of your spatial limitations.
Remember that successful compact growing is about working smarter, not larger. Focus on efficient use of vertical space, proper temperature management, and selecting the right plants for your specific structure. Start small with a basic cold frame if you’re new to season extension, or invest in a more elaborate mini greenhouse if you’re ready to maximize your growing potential.
The most important step is simply to begin. Your compact growing journey starts with the first seedling protected from frost or the first tomato ripening weeks before your neighbors’. With these space-efficient structures, you’ll discover that limited square footage doesn’t have to mean limited gardening opportunities.
Ready to Extend Your Growing Season?
Download our complete guide with detailed plans, seasonal planting calendars, and maintenance checklists for successful year-round growing in compact spaces.
Will is a vertical gardening enthusiast and sustainable cultivation specialist with a passion for helping people grow fresh food in small spaces and dry climates. With years of hands-on experience testing smart irrigation systems, optimizing urban gardens, and exploring eco-friendly solutions, this author shares clear, practical tips to turn any corner into a productive garden. Whether on a sunny balcony or in a compact backyard, Will helps readers save water, maximize space, and enjoy healthy harvests year-round. When not tending to his plants, you’ll find him sipping herbal tea and sketching ideas for new sustainable projects.

